MIL-DTL-2036E
APPENDIX A
screw would leave an unprotected opening in the enclosure. Location of holes for fasteners shall be in
accordance with A.3.3.4. There shall be a free space between the end of the bolt and the bottom of the
hole when the bolt is fully screwed home, even if all washers are omitted.
A.3.2.3.1 Screw plugs. For convenience in manufacture, holes may be drilled through enclosure walls,
the thickness of which is .1875 inch (4.76mm) or greater, provided these holes are blinded by the
insertion of a screw plug of length not less than .25 inch (6.35mm) or the diameter of the hole, whichever
is greater. Such plugs shall be securely welded or riveted. This procedure shall not be permitted where
the thickness of the enclosure wall is less than .1875 inch (4.76mm) (see figure A-6).
A.3.2.3.2 Bolt holes. Holes may be made through walls for bolts that are necessary to hold essential
parts, such as field poles, the omission of which would make the equipment inoperative, provided the
following conditions are met:
(a)
(b)
At least two bolts shall be used for each part held.
(c)
Each hole shall be bottomed in the part held and adequate metal contact provided between the
part and the wall to insure an effective internal seat around the hole if the bolt is omitted
A.3.2.3.3 Screw holes. Holes shall not be drilled through enclosure walls for screws holding
identification, information, or warning plates.
A.3.2.4 Inspection and service access openings. Openings shall be limited to the minimum number
required for proper assembly, inspection, and servicing of equipment. All inspection and access covers
and doors shall have metal-to-metal plane, stepped, or threaded joints. Glass covered inspection
openings shall not be permitted.
A.3.2.5 Auxiliary openings. No breathers, drains or pressure-relief devices to relieve pressure due to gas
explosion within the enclosure shall be permitted for explosionproof enclosures.
A.3.2.6 Welding. Tack welding may be used to secure threaded plugs or press fitted parts. Other
welding shall be continuous and free from pin holes.
A.3.3 Fastening devices. Fastening devices (bolts, screws, nuts, studs, and washers) shall be in
accordance with MIL-E-917. Bolts and screw heads shall be of the following styles: hexagon-head,
socket-head, 12-point collar. Bolts, screws, and nuts used at different locations shall, if practical, be of
identical design. Threaded fasteners shall be secured by lockwashers.
A.3.3.1 Thread engagement. The length of the thread engagement shall be not less than the major
diameter (nominal) of the thread of that diameter needed to meet the explosion and hydrostatic tests
conducted on the enclosure, whichever is greater.
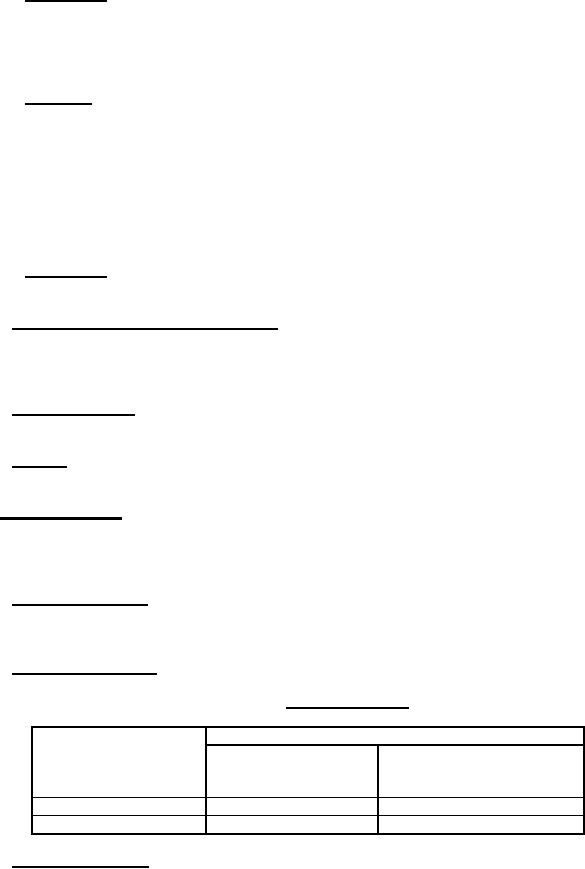
A.3.3.2 Diameter of fasteners. Diameter of fasteners shall be in accordance with table I.
TABLE A-I. Fastener diameter.
Minimum fastener diameter inches (mm)
Size of enclosure
To secure parts subject To secure nonstressed parts
internal free
to stress due to internal
(bearing inner caps and
3
volume (in )
explosion
similar parts)
60 or smaller (983cc)
.25 (6.35)
.1875 (4.76)
Unrestricted
.3125 (7.94)
.25 (6.35)
A.3.3.3 Number of fasteners. A minimum of four fasteners shall be used for each joint.
20
For Parts Inquires submit RFQ to Parts Hangar, Inc.
© Copyright 2015 Integrated Publishing, Inc.
A Service Disabled Veteran Owned Small Business